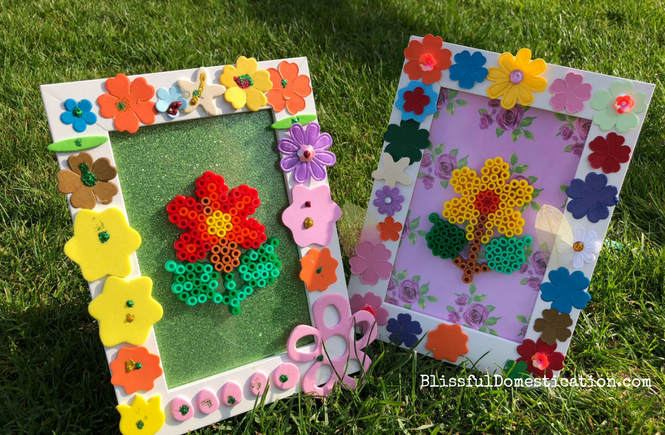
The sun is shining, and it finally feels like Summer is well on the way. This Simple Flower Artwork is a great little project you can do with your little ones, sure to make you feel cheerful and summery.
Regular readers of this blog will know that we are very fortunate to be part of the Bostik Blogger team. Each month we are sent a box of themed craft goodies to inspire us for our next creative project. This month’s theme was flowers.

Most of the time I let the girls help me come up with ideas for our craft projects. However, surprisingly it was Oliver that took the lead on this particular activity.
One evening, whilst Isla was at Rainbows, I showed him the box of crafty goodies, and he went straight for the little flower Hama beads. I’ve tried to get him to do bead crafts before, but he has always lacked the patience and concentration. This time however with some encouragement he did it all, all by himself. He was so proud of what he had created, that he wanted a way to display it, so we came up with this really Simple Flower Artwork project for kids. Naturally his sister also wanted to do one when she got home, and I think they have both turned out rather well.
So if you would like to give this Simple Flower Artwork a go with your little ones, read on, or pin it for later!
Pin It For Later!

What You Will Need
- Hama beads and board
- Iron and greaseproof paper
- Small picture frame
- Flower embellishments (sequins, cardboard flowers, foam flowers)
- Patterened card or paper
- Bostik Blu Stick
- Scissors
- Bostik Glu dots (optional)
How to Make Your Simple Flower Artwork
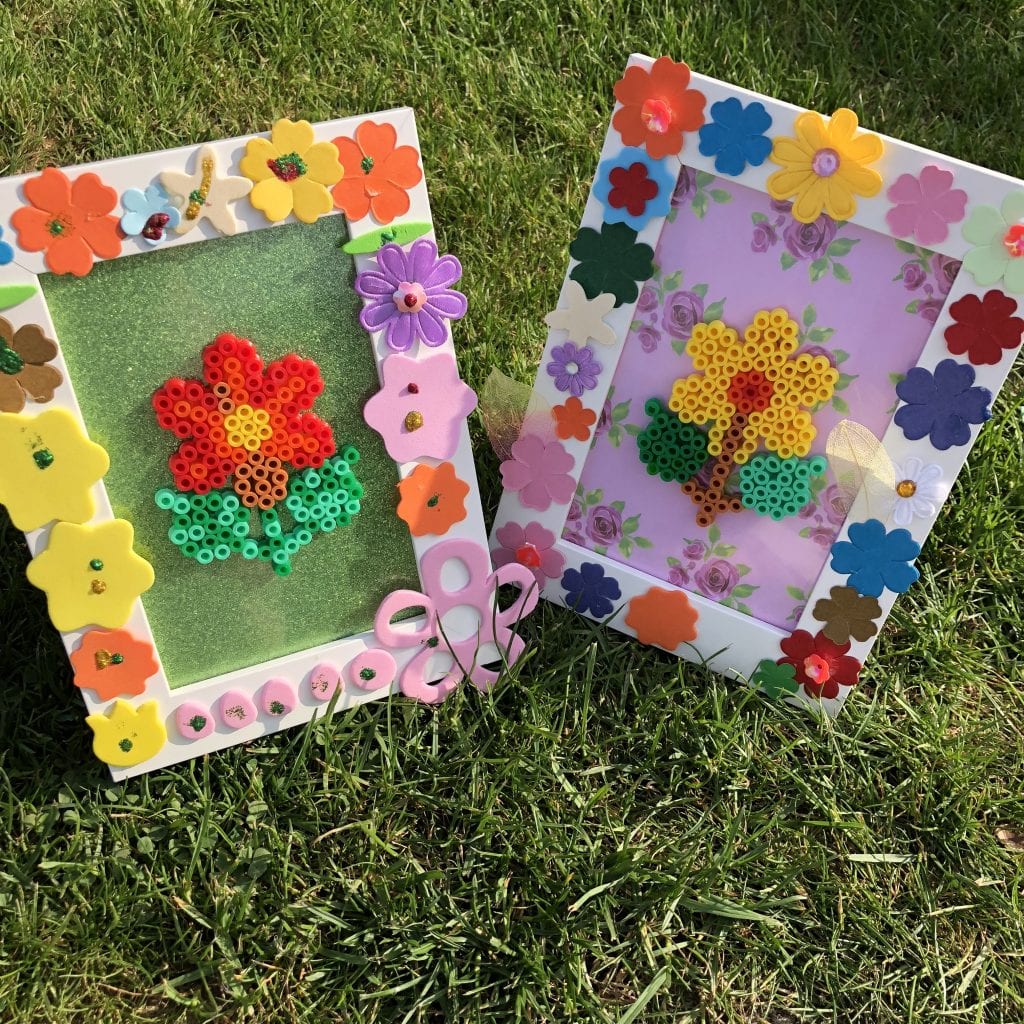
- The first step is to create your Hama bead flower. You can use a flower template like we did. Or you can use your imagination and a plain bead template. Once completed, you need to set it by placing a piece of greaseproof paper over it and iron it. When cooled you can remove it from the template.
-
Then take a simple small picture frame and embellish it with foam and cardboard flowers, gems, or whatever you like! Oliver found using Bostik Blu stick was really easy for this. It goes on blue- so he could see if he had put on enough, and then it dries clear. So it didn’t matter if he put too much on. Great for little crafters!

- Bostik also have these fab glitter pens, which are great for little ones to add glitter to their craft projects, without covering the house in glitter. Oliver choose to use the green glitter pen to decorate his flower embellishments.

- Once the glue and glitter was dry, I cut some patterned card to fit inside the picture frame. Oliver choose the shiny green background, Isla choose a pretty floral background.
- Finally the last step is to glue your bead flower to the perspex of the frame. Alternatively you can use Bostik Glu Dots if you think you may want to change your bead creation at a later stage.


That’s it, a really simple little craft project, that allows your little crafters to proudly display their bead work.

So what do you think of our Simple Flower Artwork? Have you been up to any summery crafts recently?
I love to hear ALL your feedback on my crafts, and if you never want to miss one of our posts, enter your e-mail address below for our weekly newsletter.
[convertkit form=5058995]
Kerry xx
Disclaimer: We were sent a box of craft goodies for the purpose of this post as part of our role as #BostikBloggers.


6 Comments
What a lovely idea! My little girl would love this. She is all about flowers these days. #KidsandKreativity
It’s hard not to be this time o f year isn’t it!
These are truly delightful. I recently picked up a set of beads and boards at a carboot sale for when the girls are older. #KidsandKreativity
There are so many things you can do with them, watch this space!
I think these are great! We haven’t had much luck with Hama beads yet (though I loved them as a kid) but maybe we should give them another go now x #KidsandKreativity
It’s taken Oliver a while to have the patience with them, but her really enjoyed this activity. x